Ceramic tile is a popular material for floor installations because of its toughness and resistance to stains and moisture. These same attributes make it a natural choice and design for walls, particularly in bathrooms and kitchens.
Although it’s not particularly challenging and easiest way, it’s simple to do incorrectly. It is a little trickier than installing floor tile because you are attaching a relatively heavy material to vertical surfaces. Still, any DIYer can easily and successfully install ceramic wall tile with careful planning and patience.
Depending on the tile you select, wall tile prices can vary greatly. Ordinary ceramic tiles sold in bulk at home centers can cost as little as $1 per square foot, but prices of $15 per square foot or higher are not unusual if you have your heart set on a fine designer tile.
Floor vs. Wall Tiles
You really have more alternatives for ceramic tile for walls than for floors because the thicker floor tiles may also be utilized on walls. Contrary to popular belief, you cannot use thin wall tiles as flooring. To withstand foot traffic, flooring tiles must be especially thick and robust.
Measure the area in square feet before purchasing your tile, remembering to add an additional 10% for waste and breakage, as well as some extra tiles for potential future repairs. If you don’t have extras on hand, it could be difficult to match your tiles when you need to make repairs because tile styles and colors are subject to frequent change.

First Things First
No matter if the application is on the floor or the walls, our demonstration project makes use of the supplies and equipment that are currently considered best practices for almost all ceramic, porcelain, or natural stone tile installations.
Our wall project assumes that you have first put in a cement board underlayment, which is the ideal surface for installing ceramic tile with thin-set adhesives. The underlayment for both floor and wall tiles is now almost always cement board, despite the fact that it was historically normal to install ceramic wall tiles on regular drywall or waterproof “blue-board” drywall.
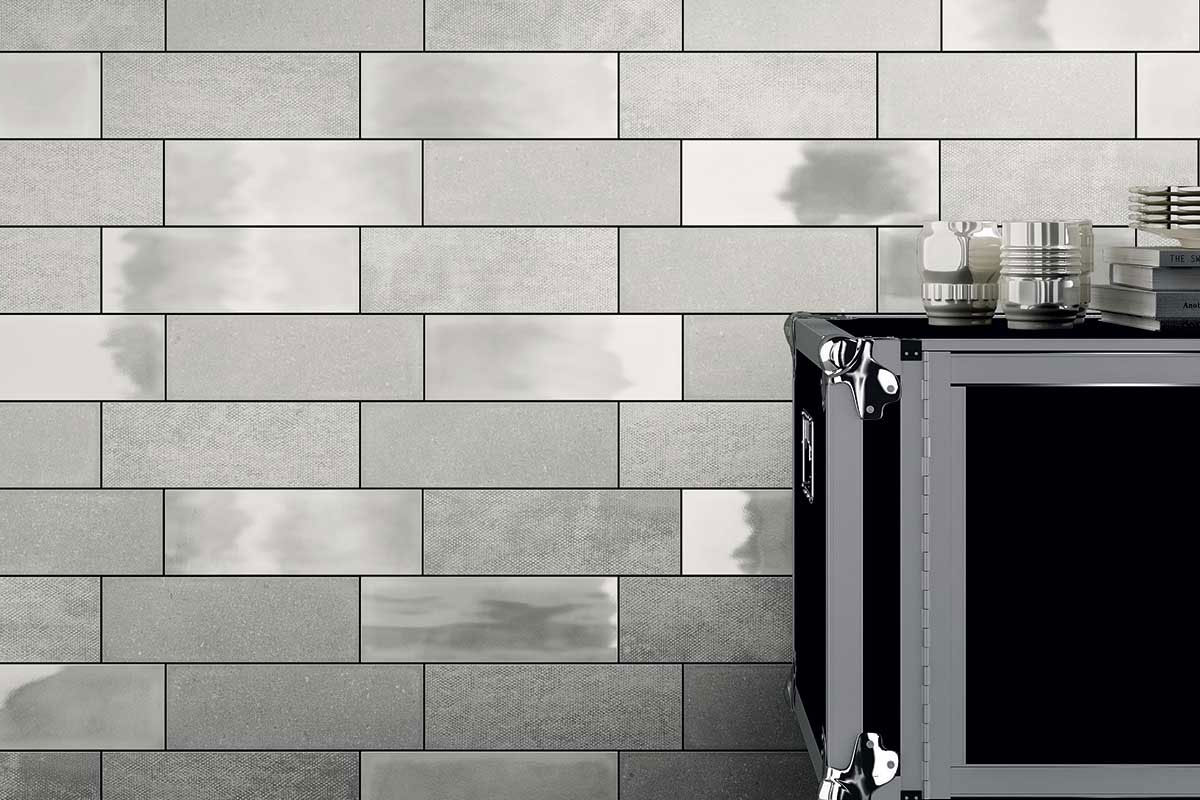
The popular ceramic wall tile known as subway tile is used in our demonstration project. It is installed in a running bond pattern, where the vertical joints are offset from row to row.
Subway tile is a very popular design for bathrooms and kitchens that got its name from its use in New York subway stations and other metropolitan subways in the early 20th century. For square tiles and other rectangular shapes, the running bond pattern can be used; alternatively, for a more straightforward design, the tiles can use straight vertical joints, also known as a straight grid pattern.
The layout is essential for a project using wall tiles that look great. Professional tile installers are adept at arranging a tile job so that the trimmed portions of the tiles are symmetrical from side to side and the grout lines are perfectly level and plumb. The top, bottom, and sides of the wall should not have any narrow rows of cut tiles. The easiest way to determine a layout is to carefully draw perpendicular layout lines as a guide for installation, which is the same technique used for floors.
Large undertakings become considerably simpler if you rent or buy the appropriate instruments for a tiling project, such as a wet saw equipped with a diamond cutting blade. If you have a big job or perform tile work frequently, an entry-level saw, which costs around $100, is a worthwhile investment. Alternatively, you can rent the tool from a big-box hardware or tool rental business.
Nevertheless, a manual snap-cutter tool, which is ideal for tiny tile jobs, can still be used to finish your job. Nevertheless, thick porcelain or natural stone tiles do not respond well to snap cutters.

Ceramic Tiles Wall and Easiest Installation Way
Based on the wall area’s square footage, calculate the number of ceramic tiles you will require to start installation with the easiest way. It’s preferable to add at least 10% to the estimate to account for waste and breakage. Some tile styles are stocked by home centers and specialty tile stores, while specialty styles frequently require special orders. Purchase any additional trim tiles that are necessary, such as base tiles, edge trim, or bullnose top trim.
The majority of wall tiles are best fixed with thin-set adhesive, a mortar-based glue comprised of cement, fine sand, and a water-retaining substance like cellulose. In order to provide thin-set some flexibility and minimize cracking, latex additives are typically included.
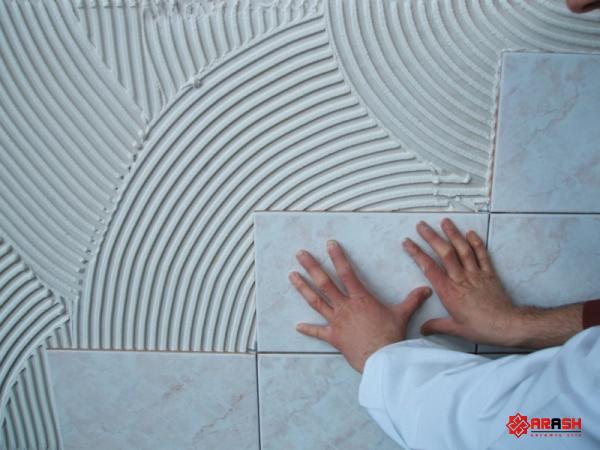
Use a notched trowel to apply thin-set glue. The thickness and size of the tile, as well as the manufacturer’s guidelines, determine the right size of the V-shaped notches on the trowel. The suggested trowel for our subway tile sample project has notches that measure 3/16 by 5/32 inches. Most tiles that are 6 × 6 inches or less fit well in this size.
Safeguard surfaces
It’s a good idea to shield floors, tabletop surfaces, and fixtures from spills of tile adhesive and grout because tiling can be a little dirty.
Purchase some thick rosin builder’s paper from a big-box store that sells painting or home improvement goods. Using painter’s tape, cover the countertops and floor surfaces with paper. Where sink faucets and other fittings are positioned, cut slots in the paper. The painter’s tape strips should be used to cover the fixtures’ exposed surfaces.
Make a layout plan
To avoid having thin slices of cut tiles at the sides or at the top and bottom, the arrangement must be carefully planned. Spend some time getting the layout just right; you’ll use the layout lines to install the tiles in quadrants, starting in the center.
Start by deciding which wall in the space is the most apparent. Establish the wall’s horizontal and vertical center points using a tape measure.
From the central location, layout lines should be extended vertically and horizontally from side to side and from ceiling to floor using a level. Then, use a sample tile to mark the layout lines to show where each tile will generally be placed along the lines, taking into account the thickness of the grout lines.
You can move the starting point to the left, right, up, or down to create the best layout if you start to notice that there are too many spaces that need thin slices of tile.
Put thin-set adhesive to use
Once you are satisfied with how the vertical and horizontal lines are laid out, start applying glue, working on one quadrant at a time, starting in the center.
Using the flat side of the trowel, apply glue to the wall quadrant, covering only the area of the wall that you can easily work on in 20 to 30 minutes.
Please return to the skim coat right away and trowel over it again, this time making ridges and valleys in the wet adhesive with the trowel’s notched side. Comb the adhesive in a single direction while holding the trowel at a 45-degree angle.
The thin-set adhesive should be used to cover the wall section, but you should still be able to see the wall’s surface between the ridges that the notched trowel left behind.
First tile row to be laid
At the center of the arrangement, place the first tile on the wall. Carefully align it with the layout’s horizontal and vertical lines. As you firmly press the tile into the glue, it flattens out and fills the spaces between the trowel-made ridges.
Utilizing plastic spacers to guarantee equal tile spacing once the first tile or sheet is put in place, finish the first row along the horizontal layout line. Leave the trimming of incomplete tiles till last; only lay full-width tiles.
Once the first row is finished, use a carpenter’s level to make sure it is level before starting the second row of tiles. When doing so, be careful to offset the vertical grout joints by precisely one-half the tile width. Utilize plastic spacers to preserve equal joints between tiles when you install the subsequent rows. It is crucial to get the offset with the running-bond pattern we are utilizing right so that the joints are spaced correctly from row to row.
Complete installing the field tiles
Use a short piece of wood and a rubber mallet to very gently tapping over the tile surface once each tiny section of the wall is finished. This will level the surface and “set” the tiles in the glue.
Repeat this procedure, working methodically in portions, until the entire wall is coated. Wait until the project is finished to trim or cut the necessary tiles. Scrape off any extra glue from the portions of the wall that are left exposed as you approach the final full tile. As you prepare to finish the installation and cut the final tile, this will stop the adhesive from hardening.
As the adhesive dries, check the grout lines to make sure no extra adhesive is present. If necessary, scrape away the extra material with a little screwdriver or pointed stick. When you get to the finishing stage, the grout lines must be open and free of obstructions in order for the grout to adhere.
Wipe any adhesive from the tile’s face using a damp sponge or cloth. When wet, the adhesive is very easy to remove, but as it dries, cleaning it will be very challenging.
Close Up the Side Gaps
Install the partial field tiles along the wall’s sides once all of the full-sized field tiles have been put in place. You can use a wet saw or a manual snap cutter to cut incomplete tiles.
Placing the tile in the tile cutter and firmly pushing a tungsten carbide scoring wheel across the tile’s surface from bottom to top will score the surface when using a snap tile cutter. After that, position the pressure bar pad over the tile and press down firmly on the lever to cause it to snap across the scoreline.
A wet tile saw is a superior solution for cutting partial tiles if you have a lot of tiles to cut. Additionally, it’s necessary for floor tiles that are thicker or made of porcelain or natural stone, which are exceedingly challenging to cut using a snap cutter.
Fill up the Last Few Gaps
Use a tile cutter or tile nipper to trim tiles where necessary to fit them around outlets, light switches, pipes, and other obstructions. Make sure the tiling doesn’t cover the electrical box opening while filling in around the outlets. Before trimming or cutting tile, be sure to wear eye protection.
It is simpler to apply adhesive to the tile’s back when inserting small tile pieces. Then, using plastic spacers to ensure straight grout lines, score the adhesive with the tile’s notched side and press the cut tile into place on the wall.
Install any trim
Install any border tiles or other trim pieces last if your arrangement includes them. In this instance, we’re using 1 x 6-inch cap tiles. In a way comparable to how the field tiles were installed, butter the backs of the tiles before pressing them against the wall.
Check the grout joints
Verify all grout lines one last time. Between the grout lines, remove any extra adhesive. Prior to grouting the tiles, give the tile glue 24 to 72 hours to dry.
Clean the Tile
Apply grout to the joints according to the manufacturer’s recommendations for the tile. Narrower joints employ non-sanded grout, while joints broader than 1/8-inch usually require sanded grout. After the grout cures, be sure to wipe away the dried haze and remove any extra grout from the tiles. If the grout manufacturer advises using a sealer, do it after the grout has fully dried and hardened.


Your comment submitted.